 How-to
How to Fix Chipped Paint on Kitchen Cabinets?
Last Updated: October 25, 2026
Quick Summary
How to fix chipped paint on kitchen cabinets starts with assessing whether you have a single chip or widespread paint failure, then cleaning and sanding the damaged area, applying bonding primer, and touching up with matching paint in thin coats. Address the root cause, moisture, grease, or poor adhesion, to prevent the chip from recurring.
- Remove loose paint with a plastic scraper, sand with 220-grit or higher sandpaper, and clean thoroughly with degreaser to remove grease that prevents adhesion.
- Use bonding primer designed for difficult surfaces like glossy paint and varnish, applying thin coats and letting each dry completely before painting.
- Match both color and sheen to the existing cabinet finish; test the match in an inconspicuous spot under your kitchen's natural and artificial lighting.
- Paint dries to touch in 1-4 hours but requires 7-14 days for full cure; avoid touching, cleaning, or bumping the repair during this window.
- If paint fails across multiple areas or chips recur within a season, the underlying cause, trapped moisture, grease buildup, or incompatible primer, must be addressed.
Table of Contents
- Assess the Damage: Chipped Paint vs. Widespread Failure
- Diagnose Why the Paint Chipped
- Prepare the Surface: Remove Loose Paint and Clean
- Sand the Chipped Area for a Smooth Finish
- Apply Bonding Primer for Paint Adhesion
- How to Touch Up Paint on Kitchen Cabinets
- How to Match Kitchen Cabinet Paint Color and Sheen
- How Long Cabinet Paint Takes to Cure and Protect It
- Frequently Asked Questions
Assess the Damage: Chipped Paint vs. Widespread Failure
The first step in how to fix chipped paint on kitchen cabinets is figuring out what you're dealing with. A single chip is one problem; paint peeling across multiple doors is a completely different situation, and knowing which you have changes how you proceed.
When to repair a single chip
A single chip or small area of damage is a straightforward repair.
Watch out: if the chip exposes bare wood, moisture can seep in and cause rot over time. Seal it quickly to prevent that problem.
Single chips come from normal kitchen use, a pot handle bump, a utensil scratch, a door swinging open too hard. These isolated repairs are exactly what touch-up work is designed for.
When to repaint the entire door or cabinet
If you see peeling, flaking, or damage across multiple areas, a touch-up won't cut it. That's paint failure, not accidental damage.
This is where diagnosis matters. Before you decide to repaint, figure out why the paint failed in the first place. That answer determines whether a new coat will last or fail again in six months.
Diagnose Why the Paint Chipped
Most people skip this step and jump straight to repair. That's a mistake.
If you don't address the root cause, the new paint will chip again and you'll be back here in a year.
Ask yourself: did the chip come from a single impact, or is the paint failing across the whole cabinet?
EPA guidance on indoor moisture and humidity recommends keeping kitchen humidity between 30 and 50 percent to prevent paint failure and mold growth.
Prepare the Surface: Remove Loose Paint and Clean
Surface preparation separates repairs that last from repairs that fail within months. It's where most people cut corners, and exactly where you shouldn't.
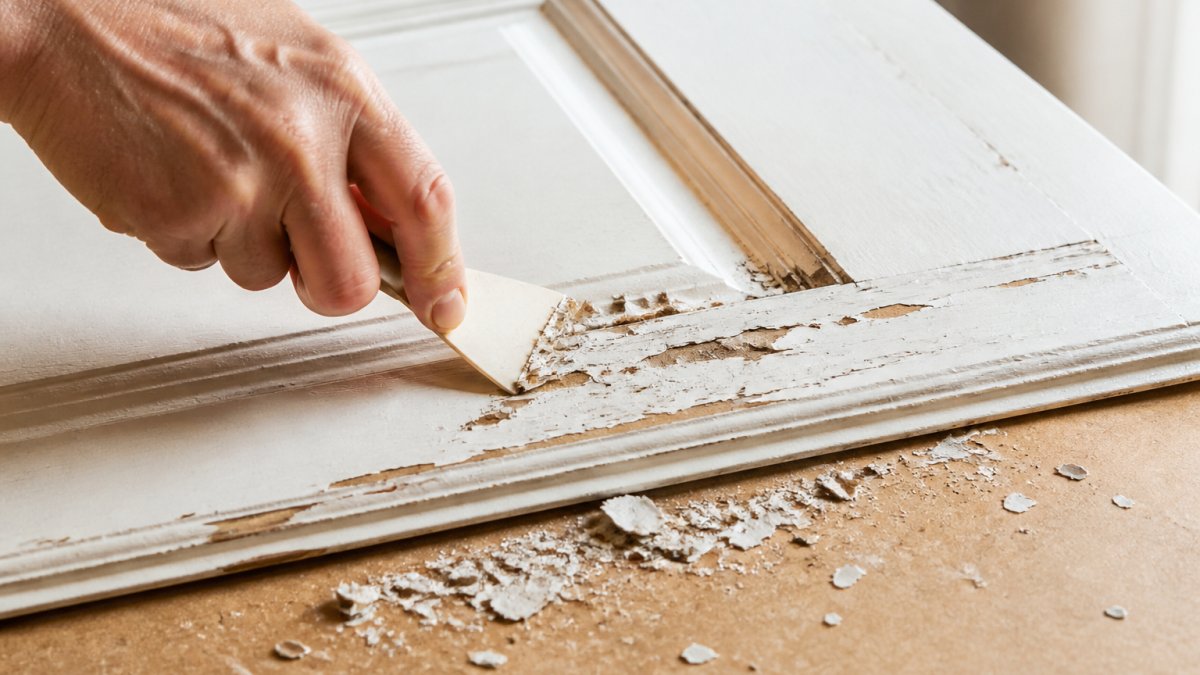
Remove loose or flaking paint
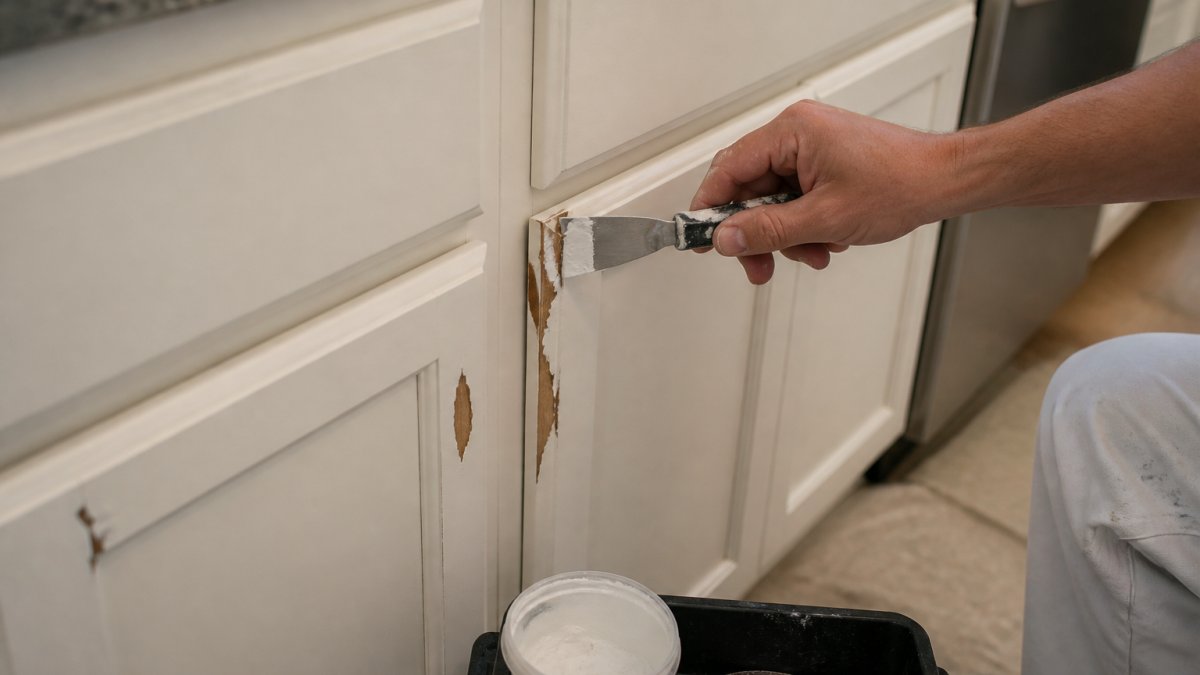
Start by removing any paint that's not firmly attached. Use a plastic scraper or putty knife to gently lift loose paint. Don't force it, if the paint is stuck, leave it alone.
Work slowly. Aggressive scraping can damage the wood or still-bonded paint. The goal is a smooth edge where loose paint ends and solid paint begins.
Clean grease and dust
Kitchen cabinets accumulate grease you can't always see, and it prevents paint from sticking.
Clean the damaged area thoroughly with a degreaser or warm soapy water, wipe it down, and let it dry.
Let everything dry completely before moving forward, trapped moisture causes the same problems you're trying to fix.
Sand the Chipped Area for a Smooth Finish
Sanding creates a surface that new primer and paint can grip. It's not optional.
Sand until the area feels slightly rough, wipe away all dust with a damp cloth, and let it dry completely.
If the chip is deep, fill it first with a cabinet-grade wood filler or putty.
The smoother your sanding, the smoother your final finish, take time here.
Apply Bonding Primer for Paint Adhesion
Primer is not optional. It's the foundation that makes paint stick.
Bonding primer is designed to adhere to difficult surfaces, glossy paint, varnish, and wood, better than regular primer.
Apply primer with a small brush or applicator in thin coats.
Let the primer dry completely per the manufacturer's instructions, usually 1-3 hours, but check the can. Don't rush it.
How to Touch Up Paint on Kitchen Cabinets
Learning how to fix chipped paint on kitchen cabinets requires the right technique and tools.
Use a small, fine-tipped brush designed for detail work.
Apply paint in thin coats, building coverage with multiple layers instead of one thick one.
Let each coat dry completely before the next.
Paint in the direction of the wood grain with smooth, even strokes.
How to Match Kitchen Cabinet Paint Color and Sheen
Matching paint color and sheen is harder than it looks. The wrong match stands out immediately, and a repair with the right color but wrong sheen can look worse than the damage did. Treat it as its own step.
Identify what is already on the cabinet
Before buying anything, figure out what finish you're painting over. Factory-finished cabinets are typically catalyzed lacquer, conversion varnish, or a factory waterborne coating, harder and more chemically resistant than site-applied paint.
Field test: rub a hidden spot (inside a door edge or the back of a drawer front) with a cloth dampened with denatured alcohol. Latex and acrylic soften and lift; oil-based or factory finishes generally resist.
Paint and primer compatibility
Not all paints work with all primers. Check the primer label for rated topcoats, most bonding primers accept latex and acrylic, but some are oil-based-topcoat only.
A common pattern: water-based bonding primer over a glossy oil-based or factory finish, followed by 100 percent acrylic cabinet paint. The bonding primer grips the hard substrate and the acrylic topcoat stays flexible.
Find the original color
Start with what the cabinet can tell you. Look for a paint label or can left by the builder or previous owner, often inside a cabinet, under a sink, or on the back of a drawer front.
If no record exists, take a physical sample. Remove a door and bring it to a paint retailer that offers color matching, most do, and the match is only as good as the sample.
Test the match before you commit
Paint color shifts under different lighting, perfect in the store can look wrong in your kitchen. Try different shades in a virtual room to preview how colors look in your space. Buy a small sample and test it in an inconspicuous spot (inside a door, the side of a cabinet box, the back of a drawer front), viewing it in natural daylight and under your kitchen lights.
Let the test patch dry fully before judging, wet paint reads lighter and glossier than cured paint. Compare it to the surrounding finish at the angle you normally view the cabinets.
Account for sheen and aging
Sheen matters as much as color. Cabinet paint comes in flat, satin, semi-gloss, and gloss. Match the existing sheen, a semi-gloss cabinet touched up with satin shows a visible dull patch even when the color is right.
Aging is the other variable. Paint and clear coats yellow, chalk, and dull with age, so a fresh match to the original formula can look too bright against a decade-old finish.
How Long Cabinet Paint Takes to Cure and Protect It
Drying and curing are not the same thing, and confusing them is the most common reason a good repair fails early. Paint dries to the touch in hours; it cures, hardens fully and reaches final resistance to moisture, cleaning, and abrasion, over days to weeks.
Dry time versus cure time
Dry-to-touch is what the can lists, usually 1-4 hours for cabinet paint; recoat time is typically 2-4 hours. Full cure runs 7-14 days for most cabinet paints, longer for harder factory-style coatings. Read the product data sheet, cure time varies by chemistry.
During cure the film is soft and vulnerable, dentable by a fingernail, softened by moisture, marred by cleaning products. Treat the repair as fragile until the full cure window passes.
Handling windows after the repair
A practical sequence most painters follow:
- Dry to touch (1-4 hours): do not touch, wipe, or close the door against the repair.
- Recoat window (2-4 hours): apply the next thin coat if needed, following the can's recoat time.
- Light handling (24 hours): the door can be closed gently and the cabinet used lightly, but avoid bumping or scrubbing the repair.
- Hardware reinstall (24-72 hours): wait until the paint is firm before reinstalling knobs and pulls, and tighten them by hand rather than with a driver that can slip and chip the fresh edge.
- Full cure (7-14 days): normal use, cleaning, and moisture exposure are safe.
Protect the repair during cure
Keep the cabinet door open where possible for air circulation. Avoid slamming doors, bumping the cabinet, or stacking dishes against the repaired face.
Kitchen heat and humidity slow cure. Run the range hood when cooking and keep the kitchen ventilated. If the repair is near the sink or dishwasher, give it extra time before exposing it to steam and splashes.
When the repair is done
Once cured, the repair is complete and the cabinet is ready for normal use. If you diagnosed the cause correctly and followed proper prep, priming, and application, it should last for years.
For repairs that extend beyond a single chip or when the underlying cause of paint failure is unclear, professional cabinet painting ensures proper diagnosis, preparation, and application.
Cabinet paint follows a specific timeline from application to full durability.
| Stage | Timeframe | What to Do |
|---|---|---|
| Dry to touch | 1-4 hours | Do not touch, wipe, or close door |
| Recoat window | 2-4 hours | Apply next thin coat if needed |
| Light handling | 24 hours | Close door gently, use cabinet lightly |
| Hardware reinstall | 24-72 hours | Reinstall knobs and pulls by hand |
| Full cure | 7-14 days | Normal use, cleaning, and moisture safe |
Frequently Asked Questions
Can you touch up chipped paint on kitchen cabinets without repainting them?
Yes, you can repair small chips without repainting the entire cabinet. The key is proper surface preparation: remove loose paint, sand smooth, apply bonding primer, and use matching paint. This works best for isolated chips smaller than a coin. If the paint is peeling across multiple areas or the finish is dull and worn, repainting the entire door or cabinet delivers a more uniform, long-lasting result.
Do you need to sand kitchen cabinets before touching up chipped paint?
Yes, sanding is essential for paint adhesion. Use fine-grit sandpaper (400-grit or higher) to smooth the edges of the chip and the surrounding area. Light sanding removes gloss from the existing finish, allowing the new paint to bond properly. Sand until the repair area blends with the surrounding surface, then clean away all dust before applying primer.
How do you match paint for kitchen cabinet touch-ups?
Bring a cabinet door or sample to a paint supplier and request a color match. Many suppliers can scan existing paint and create a custom match. Confirm the sheen (matte, satin, or gloss) matches your original finish, sheen mismatch is visible even with matching color. Ask about paint and primer compatibility, especially if your cabinets are enamel or lacquer. A professional painter can also help ensure the match is accurate.
How long does cabinet paint take to cure, and when can you use the cabinets?
Cabinet paint typically dries to the touch in 2-4 hours but takes 7-14 days to fully cure, depending on humidity, temperature, and paint type. Avoid closing cabinet doors or placing items inside during the first 48 hours. Full cure time is when the finish reaches maximum hardness and durability. Rushing this step risks smudging, sticking, or the paint chipping again prematurely.
Cabinet paint repairs work when you address the root cause, prepare the surface properly, and apply paint and primer correctly. The extra time spent on diagnosis and prep prevents future failures. If your cabinets show widespread paint failure or you're uncertain about the underlying problem, professional assessment identifies the real issue and prevents wasted effort on temporary fixes.