 How-to
Can You Paint Over Stained Wood Cabinets? A Step-by-Step Guide
Table of Contents
- Can You Paint Over Stained Wood Cabinets? Yes, Here's Why It Works
- Understanding What You're Working With: Identifying the Existing Finish
- How to Prep Cabinets for Painting: The Foundation of Success
- Choosing the Best Primer for Stained Cabinets
- Brush or Roller for Painting Cabinets: Choosing Your Application Method
- Applying Paint: Technique, Coats, and Drying
- Cabinet Paint Curing Time: Why Patience Matters
- Common Challenges and How to Avoid Them
- Frequently Asked Questions
Last Updated: October 17, 2026
Can You Paint Over Stained Wood Cabinets? Yes, Here's Why It Works
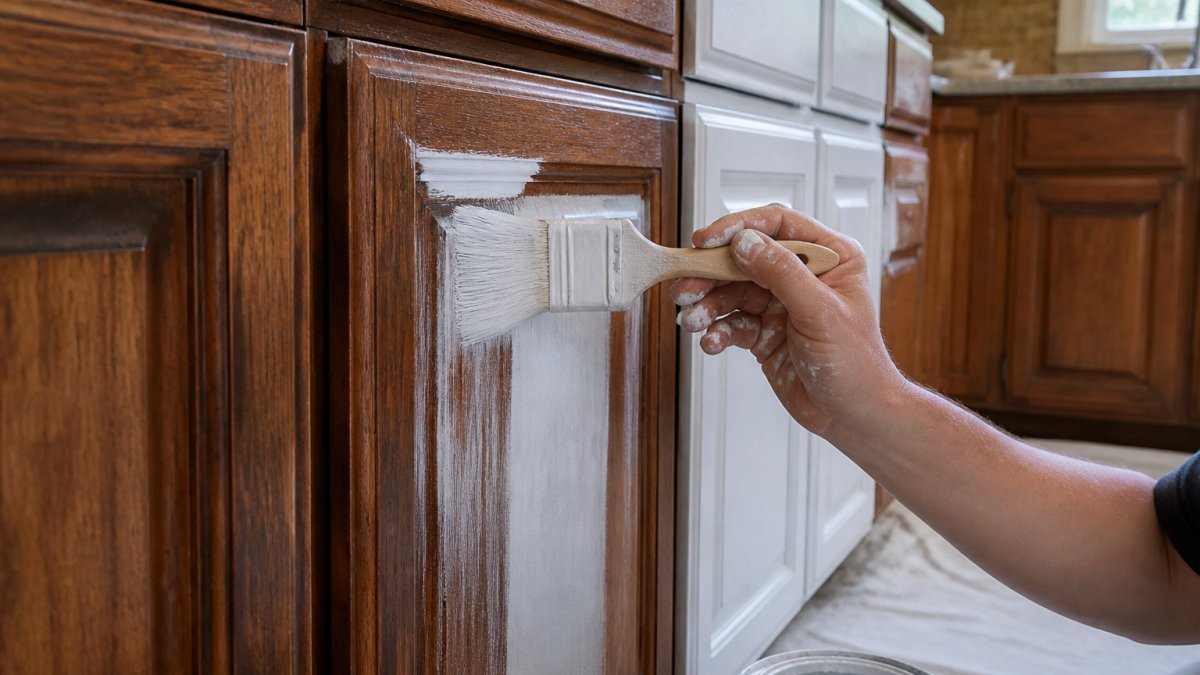
Yes, you can paint over stained wood cabinets. The key is understanding what you're working with and preparing the surface properly.
Stained wood has a glossy, sealed surface that resists paint adhesion. Paint won't stick to a slick finish without proper preparation.
The difference between a paint job that peels after two years and one that holds up comes down to surface prep. Most DIY attempts fail because they skip steps or rush through preparation.
Understanding What You're Working With: Identifying the Existing Finish
Before you paint, identify what finish is on your cabinets. Different finishes require different approaches.
Spotting polyurethane and glossy surfaces
Run your hand across the cabinet. Does it feel smooth and slick? That's likely polyurethane or a similar poly finish.
Look at the wood grain. On stained cabinets, you can usually see the grain pattern through a clear or tinted finish. That transparent layer is what makes paint adhesion difficult.
Shine a light on the surface. A glossy polyurethane finish will reflect the light sharply. A matte finish will scatter it.
Testing for oil-based or water-based stain
Dab a small amount of mineral spirits on a hidden area with a cloth. If the stain softens or the cloth picks up color, it's likely oil-based.
This matters for primer selection. Oil-based stains can bleed through water-based primers. You'll need a stain-blocking primer if the stain is oil-based.
Check the cabinet doors for any labels or documentation. Older cabinets are often stained with oil-based products. Newer ones may use water-based stains.
How to Prep Cabinets for Painting: The Foundation of Success
Surface preparation is where most cabinet painting projects succeed or fail. Rushing this step is the number one reason paint peels or fails to adhere properly.
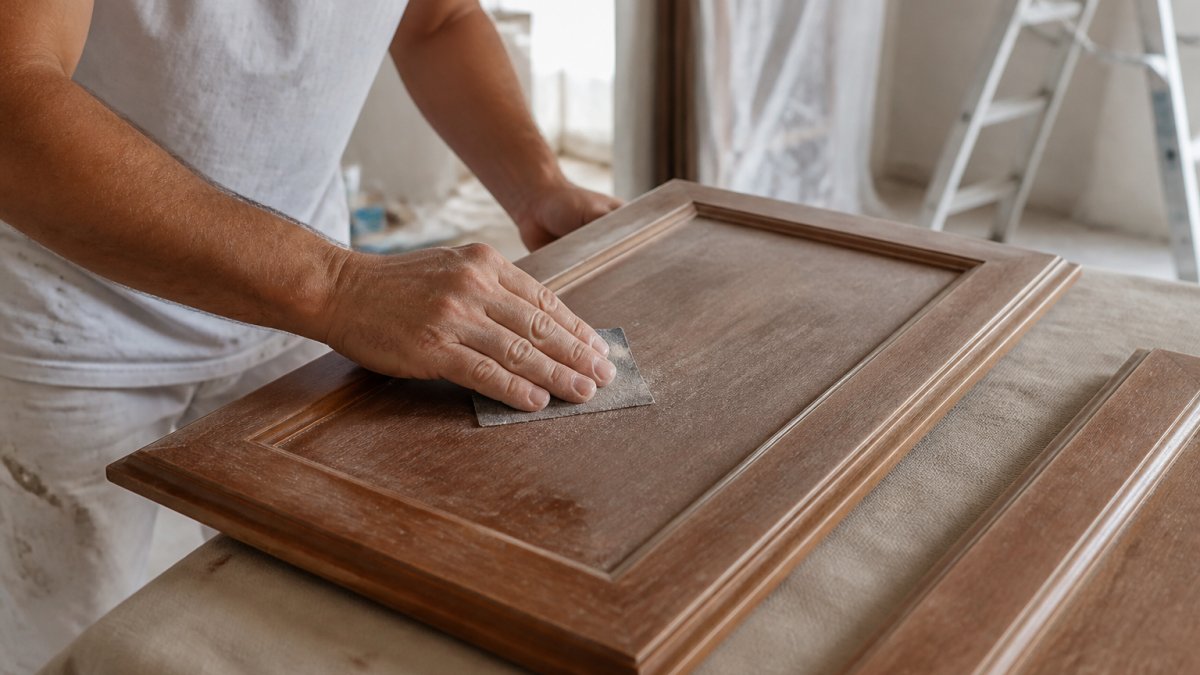
Cleaning and degreasing cabinet surfaces
Start by removing all cabinet doors and hardware. Label each door so you know where it goes when you reinstall it.
Wipe down every surface with a degreaser or TSP (trisodium phosphate) solution. Kitchens accumulate grease, dust, and cooking residue.
Use a cloth or soft brush. Work in sections. Rinse with clean water and let dry completely.
For stubborn grime, let the degreaser sit for a few minutes before wiping. Don't skip this step, it's non-negotiable.
Sanding and scuff-sanding for surface adhesion
This is where you break the glossy finish so primer can grip the wood.
Use 120-150 grit sandpaper for initial sanding. Sand the entire surface of each cabinet door and frame.
Sand in the direction of the wood grain. Use even pressure. This takes time but is critical for paint adhesion.
After initial sanding, use 180-220 grit sandpaper for a final scuff.
Dust removal and final wipe-down
Sanding creates a lot of dust. Vacuum all surfaces thoroughly. Use a brush attachment to get into corners and crevices.
After vacuuming, wipe down with a tack cloth or a slightly damp cloth. This removes fine dust particles that can interfere with primer adhesion.
Let everything dry completely. Any moisture will prevent primer from bonding properly. Wait at least two hours after wiping before applying primer.
Choosing the Best Primer for Stained Cabinets
The right primer makes the difference between a finish that holds and one that fails. Not all primers are created equal for this application.
Bonding primers and stain-blocking solutions
A bonding primer is formulated to adhere to glossy surfaces. It grips the wood even where paint normally wouldn't stick.
For stained cabinets, look for a primer that explicitly states it bonds to glossy surfaces or stained wood.
If the stain is oil-based, use an oil-based bonding primer or a shellac-based stain blocker.
Apply primer in thin coats. Two coats are typically needed. Let each coat dry per manufacturer instructions before applying the next.
Preventing tannin bleed-through
Tannins are natural compounds in wood that can bleed through paint and stain the finish.
A stain-blocking primer prevents this. These primers are designed to seal in tannins and prevent discoloration.
If you notice tannin bleed after painting, sand lightly and apply another coat of stain blocker before repainting.
For dark or red stains, use a shellac-based primer. It's the most effective at blocking tannins. Oil-based bonding primers are the second choice.
Brush or Roller for Painting Cabinets: Choosing Your Application Method
Your application method affects the final finish quality. Different surfaces call for different tools.
When to use a brush for cabinet doors and frames
A brush gives you control and works well for detailed areas.
Use a high-quality angled brush. Cheap brushes shed bristles and leave streaks. Invest in a good brush, it makes a visible difference.
Apply paint in the direction of the wood grain. Use long, smooth strokes. Avoid overworking the paint, which creates brush marks.
A brush is ideal for the cabinet frame and any areas with trim or detail.
When to use a roller for flat surfaces
A roller covers flat surfaces quickly and evenly. Cabinet door panels that are large and flat are perfect for a roller.
Use a high-density foam roller. It produces a smooth finish without texture. Avoid thick nap rollers, which can leave an orange-peel texture.
Apply paint in thin, even coats. Roll in one direction for consistency. A roller is faster than a brush but requires more care to avoid drips.
Paint sprayer considerations
A paint sprayer produces the smoothest finish. Professional painters often use sprayers for cabinet work.
Sprayers require more setup and cleanup. They also require proper ventilation and technique to avoid overspray. For a DIY project, a sprayer is optional unless you're comfortable with the equipment.
If you use a sprayer, practice on scrap wood first. Sprayers are unforgiving if you're unfamiliar with them.
Applying Paint: Technique, Coats, and Drying
Application technique directly affects the durability and appearance of the finished cabinets.
Applying thin, even coats of cabinet-grade paint
Use cabinet-grade enamel paint. Standard wall paint won't hold up to the wear and tear cabinets experience.
Apply paint in thin coats rather than one thick coat. Thin coats dry evenly and resist drips and runs.
Work in a well-ventilated area. Keep the room temperature between 50-85°F. Paint doesn't cure properly in cold or humid conditions.
Maintain a wet edge.
How many coats you actually need
Most cabinet projects need two coats of paint over primer.
Apply the first coat evenly. Let it dry per manufacturer instructions, usually 4-8 hours for latex paint, longer for oil-based.
Sand lightly between coats with 220-grit sandpaper. This helps the next coat adhere. Wipe away dust before applying the second coat.
A second coat usually provides full coverage. If you see any stain or primer showing through, apply a third coat.
Cabinet Paint Curing Time: Why Patience Matters
Drying and curing are not the same thing. Understanding the difference prevents damage to your newly painted cabinets.
Drying versus curing: understanding the difference
Drying is when the paint feels dry to the touch. This typically takes 4-8 hours for latex paint. Curing is when the paint reaches full hardness and durability.
Paint that feels dry can still be damaged. Don't use the cabinets until they're fully cured. A scratch or dent during the curing phase can mar the finish permanently.
Curing times vary by paint type. Latex paint cures in 7-14 days. Oil-based paint can take 3-4 weeks to fully cure.
Realistic timelines for full hardness and durability
Don't reinstall cabinet doors or use the cabinets for at least one week after the final coat. Two weeks is safer.
For oil-based paint, wait three weeks before normal use. The finish will continue to harden during this time.
Temperature and humidity affect curing time. Cool, dry conditions speed curing. Cold, humid conditions slow it down.
Once fully cured, the paint hardens to a durable finish that resists chipping and scratching.
Common Challenges and How to Avoid Them
Even with proper preparation, challenges can arise. Knowing what to watch for helps you catch problems early.
Paint adhesion failures and peeling
Peeling paint usually means the surface wasn't prepared adequately. If you skip sanding or degreasing, primer won't adhere, and paint will follow.
The fix is to sand off the peeling paint, re-prep the surface, apply primer, and repaint. This is why getting prep right the first time saves time and money.
Moisture is another common culprit. If cabinets are exposed to high humidity or water, paint can fail. Ensure cabinets are in a dry environment during curing.
Stain bleed-through and discoloration
Dark or red stains sometimes bleed through paint. This appears as a brownish or reddish tint showing through the final coat.
A stain-blocking primer prevents this. If bleed-through occurs after painting, sand and apply a stain blocker, then repaint.
Oil-based stains are more prone to bleed-through than water-based stains. Using the right primer for the stain type prevents this problem.
Uneven coverage and finish defects
Uneven coverage happens when coats are too thick or applied inconsistently. Thin, even coats prevent this.
Brush marks appear when you overwork the paint or use a low-quality brush. A good brush and smooth, confident strokes prevent this.
Drips and runs occur when paint is too thick or applied to vertical surfaces too generously. Apply thin coats and maintain a wet edge to prevent this.
Painting over stained wood cabinets is achievable when you follow a structured process. If you'd rather have professionals handle the project, we offer free estimates and work with homeowners to define the exact scope before any work begins. Build a free estimate with us today and see how proper preparation transforms your cabinets.
| Step | Key Focus | Duration |
|---|---|---|
| Surface identification | Determine finish type and stain base | 15 minutes |
| Cleaning and degreasing | Remove grease and residue | 1-2 hours |
| Sanding | Create texture for primer adhesion | 2-4 hours |
| Dust removal | Eliminate all sanding dust | 30 minutes |
| Primer application | Two coats of bonding or stain-blocking primer | 2 days (drying) |
| Paint application | Two to three coats of cabinet-grade enamel | 3-5 days (drying) |
| Curing | Full hardness and durability | 7-14 days (latex) or 3-4 weeks (oil-based) |
Frequently Asked Questions
Can you paint stained cabinets without sanding?
Sanding is not always mandatory, but it's strongly recommended. A glossy polyurethane finish or slick stain prevents paint adhesion. Light scuff-sanding roughens the surface so primer and paint bond properly. If you skip sanding, use a bonding primer formulated for glossy surfaces, but adhesion failures are more likely. Proper surface preparation is the difference between paint that lasts years and paint that peels within months.
What primer should you use on stained wood cabinets?
Use a bonding or stain-blocking primer designed for glossy surfaces and wood. Oil-based primers excel at blocking tannin bleed-through and adhering to stained wood, but they require mineral spirits cleanup and longer drying times. Water-based bonding primers dry faster and have lower VOCs, but may need two coats for full stain blocking. For cabinets with dark stains, a stain-blocking primer prevents discoloration from showing through paint.
How long does it take for painted cabinets to cure?
Paint feels dry to the touch in 2-4 hours, but cabinet paint needs 7-14 days to fully cure and harden. During this curing period, avoid heavy use, moisture, or heat. Full hardness determines durability and washability. Rushing back into use before curing is complete causes soft spots, scratches, and premature wear. Plan your timeline accordingly, if cabinets are in active use, allow at least two weeks before resuming normal kitchen or bathroom activity.
Is it better to roll or brush paint cabinets?
Use a brush for cabinet doors, frames, and edges to maintain control and avoid drips. Brushes create smoother finishes on vertical surfaces and tight spaces. Use a roller on large flat surfaces like cabinet sides or under-cabinet areas for faster, more even coverage. Many professionals combine both: brush for detail work, roller for large flat panels. Quality tools matter, cheap brushes shed bristles and create texture, degrading the final finish.