 How-to
How to Prep Kitchen Cabinets for Painting Properly
Table of Contents
- Why Proper Cabinet Prep Determines Paint Durability
- Step 1: Remove Cabinet Doors, Drawer Fronts, and Hardware
- How to Clean Kitchen Cabinets Before Painting
- Step 2: Protect Work Areas and Set Up Dust Control
- Step 3: Assess Cabinet Surfaces and Handle Problem Areas
- Step 4: Sand or Scuff Cabinet Surfaces
- Kitchen Cabinet Painting Tools and Supplies You'll Need
- Best Primer for Kitchen Cabinets and How Many Coats
- Frequently Asked Questions
Last Updated: October 13, 2026
Why Proper Cabinet Prep Determines Paint Durability
Learning how to prep kitchen cabinets for painting properly is what separates paint that lasts five years from paint that peels within months.
Paint doesn't stick to dirt, grease, or gloss, only to a clean, slightly roughened substrate.
Here's what matters: how to prep kitchen cabinets for painting properly isn't just about aesthetics, it's about protecting your investment.
Step 1: Remove Cabinet Doors, Drawer Fronts, and Hardware
Start by removing everything painted separately. Take off cabinet doors and drawer fronts for flat surfaces and to prevent paint dripping onto frames.
Remove all hardware, hinges, knobs, pulls, fasteners, with a properly fitted screwdriver, since a mismatched one strips slots. Place each screw in a labeled container.
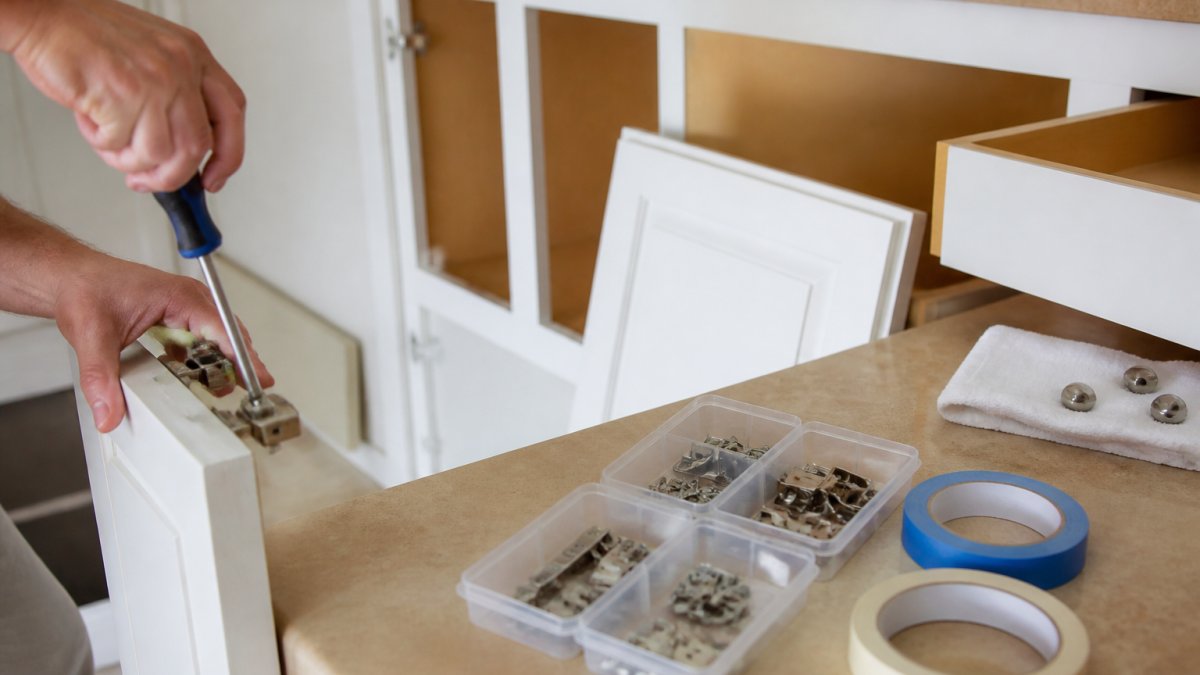
Label Everything for Reassembly
Use painter's tape and a marker to label the back of each door with its location, "Upper left," "Lower middle," etc., and the same for drawer fronts.
Photograph the open cabinet before removing anything; it becomes your reassembly reference.
Group screws by type and size in labeled containers, small hinges, large hinges, knobs, pulls separated. This saves hours during reassembly.
How to Clean Kitchen Cabinets Before Painting
Cleaning is where most people cut corners, and it decides whether the paint holds. Cabinets collect grease, dust, cooking residue, and, on older cabinets, polish and wax. Paint won't stick to any of it, so you need a clean, residue-free substrate you verify, not assume.
Clean by Zone, Not by Cabinet
Grease doesn't distribute evenly. Treat the kitchen in zones so effort goes where buildup is.
- Zone 1, the cooking zone: Cabinets above, beside, and behind the range and microwave. Airborne grease lands and bakes on here. These need a full degreaser, often more than one pass.
- Zone 2, the splash and handling zone: Sink cabinets, dishwasher surround, and any door or drawer touched with wet or greasy hands. Handles, edges, and the area around pulls collect an easy-to-miss film.
- Zone 3, the perimeter: Upper cabinets away from the range, tall pantry doors, and cabinet sides. These usually need only an all-purpose cleaner and a wipe-down, but do not skip them. Dust and polish residue still block adhesion.
Choose the Right Cleaner for the Job
- Degreaser (alkaline, water-based): The workhorse for Zones 1 and 2. Mix per the label. Most need 5 to 10 minutes of dwell time on heavy buildup. Don't let it dry on the surface; work in sections.
- Dish soap and warm water: Mild option for light dust and fingerprints in Zone 3. Not strong enough for baked-on grease.
- TSP substitute (phosphate-free): For very greasy or smoke-damaged cabinets and waxed surfaces. Follow the label for dilution and rinse thoroughly. TSP itself is restricted in some areas; the substitute is widely available.
The Residue-Check Protocol
This step tells you whether you're actually ready to prime.
- Wash with your cleaner and a non-abrasive sponge or microfiber cloth.
- Rinse with clean water, cleaner residue itself interferes with adhesion.
- Dry with a clean cloth; standing water can raise grain on wood.
- Check with a clean white cloth or paper towel, wiping firmly. If it picks up gray, brown, or greasy film, repeat the wash and rinse.
- Spot-check the tough spots: the bottom edge of a door, the inside of a pull, and the underside of upper cabinets, these fail first.
If the white cloth comes away clean, the surface is ready. If not, keep going, primer over residue is the most common cause of peeling cabinet paint.
Degreasing Cooking Residue and Stuck-On Material
Stubborn residue requires patience. Some buildup will not come off with a single pass.
For dried food, candle wax, or thick grease, apply degreaser, let it sit 5 to 10 minutes, then scrub with a non-abrasive sponge.
Never use steel wool on finished cabinets, it scratches. Stick to soft sponges and plastic scrapers.
After removing stuck-on material, wipe again with a clean cloth and degreaser, then rinse thoroughly and dry, remaining residue interferes with adhesion.
Material-Specific Cleaning Notes
- Wood and veneer: Don't soak. Use a damp, not wet, cloth, and dry promptly to avoid raising grain or swelling edges.
- Laminate and melamine: Non-porous, so they clean easily but show streaks. Rinse well and buff dry.
- Thermofoil: Clean gently. Solvents and abrasives can lift the vinyl wrap at the edges. Use a mild degreaser and a soft cloth.
If you skip the degreasing and residue check, primer and paint will peel within months. Grease acts as a release agent, paint slides right off. This is the most common reason cabinet paint fails prematurely, and it is entirely preventable.
Clean in the same order you will paint: top to bottom, back to front. Dirt and drips fall, so cleaning the uppers last means re-cleaning the lowers. Work in sections small enough that the cleaner does not dry before you rinse.
Step 2: Protect Work Areas and Set Up Dust Control
Prep work creates dust, and sanding creates more. Contain it.
Lay drop cloths on the floor and extend them beyond the cabinet area, since dust travels.
Close interior doors to keep dust out of the rest of your home, and open windows for ventilation, especially with chemical degreasers or primers.
If you have a helper, have them wipe down surfaces as you work so dust doesn't settle on wet primer or paint.
Step 3: Assess Cabinet Surfaces and Handle Problem Areas
Before sanding, inspect every surface for damage, hazards, and areas needing special attention.
Run your hand across the finish for rough spots, peeling paint, or areas worn through to bare wood, these need different treatment than intact surfaces.
Checking for Lead Paint and Hazardous Coatings
If your home was built before 1978, cabinet paint may contain lead, which is hazardous when sanded or scraped.
If you suspect lead paint, don't sand, contact a professional lead abatement contractor to test and remove it safely using containment and wet methods.
For cabinets with modern paint (post-1990), lead is unlikely, but if in doubt, test first. Inexpensive lead test kits are available at hardware stores.
Filling Holes, Dents, and Surface Damage
Fill small holes from old hardware with wood filler matching your cabinet material and finish. Apply with a putty knife, overfilling slightly, then sand smooth and flush once dry.
Shallow dents can be left if the finish will cover them; deeper dents should be filled, and deep gouges or splits may need professional repair before painting.
Fill all damage before sanding for a smooth, even surface.
Step 4: Sand or Scuff Cabinet Surfaces
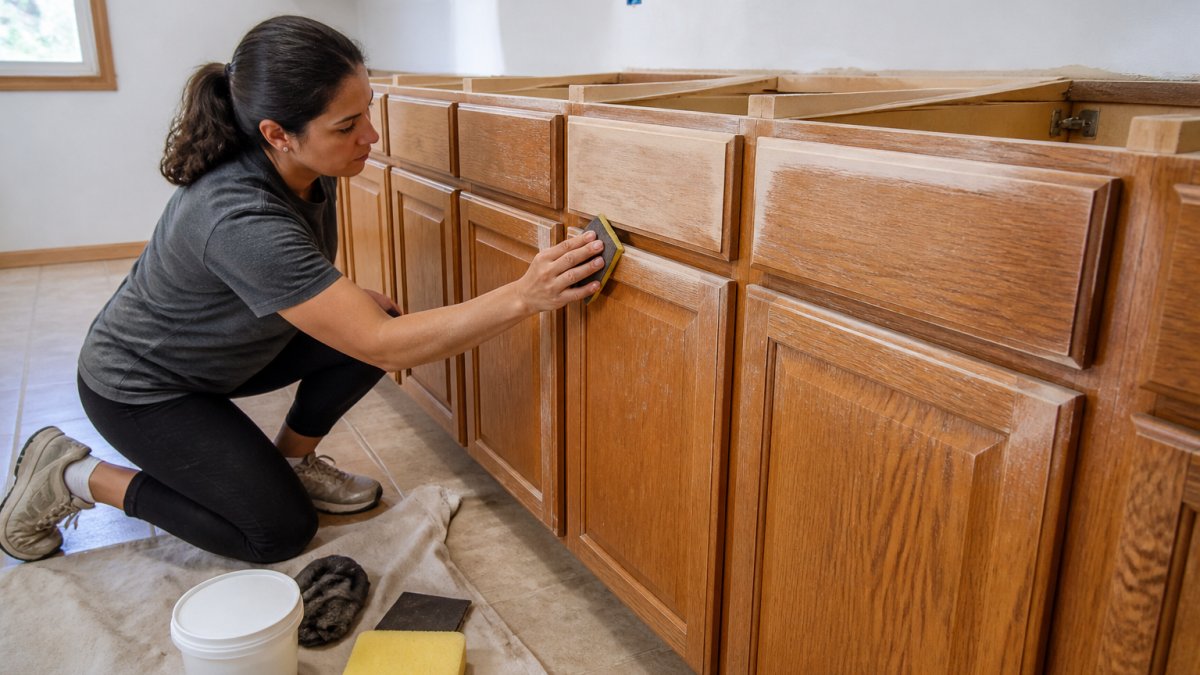
This step creates the mechanical "tooth" primer needs to grip. You're not stripping to bare wood, you're dulling the existing finish so the next coat has something to bite into. How much you sand depends on the material and what's already on it.
Match the Prep Method to the Cabinet Material and Finish
Not every cabinet takes the same prep, treating a thermofoil door like solid oak is a common way to ruin a finish.
- Solid wood and wood veneer: These take sanding well. Scuff with 120-grit, then step to 150- to 180-grit. Wood absorbs moisture unevenly, so wipe with a damp cloth and let it dry fully before priming to raise and knock down grain fuzz.
- Laminate and melamine: Non-porous and slick. Aggressive sanding scratches the surface and can chip edge banding. Use a light 220-grit scuff, then a bonding primer made for glossy surfaces. Wipe with a deglosser if very shiny.
- Thermofoil (the flexible vinyl wrap common on many factory cabinets): The most fragile. Heat, solvents, and heavy sanding can lift or bubble the wrap. Don't sand through the film. Clean carefully, scuff very lightly with 320-grit, and use a primer labeled for hard-to-bond surfaces. If the wrap is peeling at the edges, prep won't fix it, the loose film must be removed or the door replaced.
Sanding Alternatives and When They Are Appropriate
Sanding isn't the only option, and for some cabinets it's the wrong one.
- Scuff sanding (150- to 220-grit): The default for cabinets in good condition with a factory or well-bonded finish. Fast, low dust, preserves the existing coating. Enough for most modern kitchens.
- Full sanding (80- to 120-grit): Use when the finish is damaged, peeling, or has multiple layers of old paint. You're removing material, not just dulling it. Follow with 120-grit to feather edges so the repair doesn't show through the topcoat.
- Liquid deglosser (liquid sandpaper): A chemical alternative when you can't sand, detailed profiles, spindles, or thermofoil you're afraid to abrade. It softens gloss so primer can bond, but it's not a substitute for cleaning, deglosser over grease fails like paint over grease. Needs ventilation; follow the label for dwell time and rinsing.
Sanding Mechanics That Prevent Visible Scratches
Grit progression matters. Jumping from 80-grit straight to 220-grit leaves deep scratches that show through paint as faint lines. Work in steps: 80 → 120 → 150 or 180.
Use a sanding block on flat surfaces to avoid rounding edges, and sand raised-panel profiles by hand with folded paper.
Change paper when it clogs, clogged paper burnishes instead of abrading, reducing adhesion.
Wipe Away Sanding Dust, Then Check for Residue
Dust is the enemy of adhesion. After sanding, vacuum with a brush attachment, then wipe with a damp microfiber cloth, a dry rag just moves dust around.
Do a residue check before priming: wipe a clean white cloth across a cabinet face. If it comes away gray or greasy, re-wash with degreaser, rinse, and dry.
Sanding is not one step, it is a decision. Match the grit and method to the material, progress through grits, and verify the surface is dust-free and residue-free before primer. That check is what separates a finish that lasts from one that fails.
If you sand through a thermofoil or laminate surface, you expose the substrate underneath, which may not accept paint evenly. Stop sanding the moment the gloss is gone. If you break through, spot-prime the exposed area and let it cure before continuing.
Troubleshooting Adhesion Problems Before They Happen
Most adhesion failures trace back to prep, not paint. Prevent the common ones:
- Peeling: Almost always grease, dust, or a glossy surface that wasn't scuffed. Re-clean, re-scuff, and use a bonding primer.
- Fisheyes (small craters in the finish): Caused by silicone, oil, or furniture polish residue. Wipe with a degreaser, then a clean water rinse. Avoid silicone-based polishes on cabinets you plan to paint.
- Tackiness or a finish that never fully hardens: Usually too many coats applied too fast, or paint over a contaminant. Follow recoat windows on the label and don't rush dry time.
If you catch any of these after primer, stop. Fix the surface before topcoat. Painting over a defect locks it in.
Kitchen Cabinet Painting Tools and Supplies You'll Need
Gather everything before you start, running out mid-project breaks your rhythm.
Essential tools:
- Screwdrivers (multiple sizes)
- Painter's tape and masking materials
- Drop cloths or plastic sheeting
Tool quality matters: cheap brushes shed bristles into wet paint and cheap sandpaper clogs quickly. Decent tools make the job faster and the result better.
Best Primer for Kitchen Cabinets and How Many Coats
Cabinet primer differs from wall primer: it bonds to glossy surfaces, fills grain, and provides a smooth base for topcoat.
Choose a primer designed for cabinets or trim. Oil-based primers offer excellent adhesion and grain-filling; water-based dry faster and clean up easier.
Apply primer with a quality brush.
Let primer dry completely between coats and before painting, following the manufacturer's drying time.
How Many Coats of Primer for Cabinets
One coat of quality cabinet primer is the minimum.
Three coats is overkill for most projects. It extends drying time without meaningful benefit.
The real variable is paint quality and color.
| Scenario | Primer Coats | Paint Coats | Total Coats |
|---|---|---|---|
| Light cabinet, light paint | 1 | 2 | 3 |
| Dark stain, light paint | 2 | 3 | 5 |
| Medium finish, medium paint | 2 | 2 | 4 |
| Glossy finish, any color | 2 | 2-3 | 4-5 |
Let each coat dry fully before the next, rushing leads to adhesion problems and runs.
If you're planning a cabinet refresh, build a free estimate with us.
Frequently Asked Questions
Do kitchen cabinets need to be sanded before painting?
Yes. Sanding or scuffing cabinet surfaces is essential for paint adhesion. If cabinets are already painted, light scuff sanding (120-150 grit) dulls the existing finish enough for primer to grip. Unfinished or stained wood should be sanded to 120-150 grit to open the surface. Sanding removes dust and residue that can cause peeling. Always wipe down with a damp sponge after sanding to remove sanding dust before priming.
How do you clean grease off kitchen cabinets before painting?
Use a degreaser or warm soapy water with a sponge to remove cooking grease and stuck-on residue. For heavy buildup, apply degreaser, let it sit 5-10 minutes, then scrub gently. Wipe thoroughly with a clean damp sponge and allow surfaces to dry completely. Pay special attention to areas above the stove and near handles where grease accumulates. Residual grease prevents primer and paint from adhering properly, so thorough degreasing is critical for durability.
How many coats of primer should I put on cabinets before painting?
Most cabinet projects require 2 coats of primer. One coat is rarely sufficient for adequate adhesion and stain blocking. If cabinets are stained or have dark existing paint, a second coat prevents color bleed-through. Allow each coat to dry per manufacturer instructions (typically 1-4 hours) before applying the next. After primer cures fully, lightly scuff between coats with 220-grit sandpaper and wipe away dust for best paint adhesion.
What are common mistakes when painting kitchen cabinets?
The biggest mistakes are skipping degreasing (leading to paint peeling), insufficient sanding or priming, and painting without removing doors and hardware. Applying paint directly over grease or without proper surface prep causes adhesion failure. Not labeling doors and hardware creates reassembly confusion. Rushing drying times between coats and applying paint in high humidity or cold temperatures also compromises results. Proper prep takes time, but skipping steps almost always results in premature peeling or poor finish quality.