 How-to
Professional Cabinet Painting in Tampa: Process & Costs
Table of Contents
- Why Professional Cabinet Painting Transforms Kitchens
- Kitchen Cabinet Painting Cost: What Determines Your Investment
- Professional Cabinet Painting Process: Step-by-Step
- How Long Does Cabinet Painting Take: Timeline Expectations
- Cabinet Painting vs. Cabinet Replacement: Which Makes Sense
- Durability and Maintenance: Keeping Your Painted Cabinets Looking New
- Choosing a Professional Cabinet Painter: What to Look For
- Frequently Asked Questions
Last Updated: October 7, 2026
Why Professional Cabinet Painting Transforms Kitchens
A kitchen cabinet makeover doesn't require gutting your entire cabinetry. Professional cabinet painting offers homeowners a way to refresh their space without the disruption and expense of full replacement. When done correctly, cabinet painting delivers a factory-smooth finish that can last for years, transforming a dated kitchen into one that feels brand new.
The difference between DIY attempts and professional work comes down to preparation and technique. Most homeowners underestimate how much surface preparation determines whether paint will adhere properly and resist peeling. The right approach involves sanding, priming, and applying finish coats with precision that takes experience to execute consistently.
Cabinet restoration through painting also preserves the structural integrity of existing cabinetry. If your cabinets are solid wood and the doors close properly, painting is almost always the smarter choice than replacement. You keep what works, update the appearance, and avoid weeks of construction mess in your home.
Kitchen Cabinet Painting Cost: What Determines Your Investment
Understanding what drives professional cabinet painting cost helps you evaluate quotes and avoid surprises. Several factors influence the final price, and transparent contractors will break these down before starting work.
Cost Factors That Impact Your Quote
The size of your kitchen is the primary driver of cabinet painting cost. A small galley kitchen with 10-12 cabinet units costs significantly less than a large open kitchen with 20+ units plus an island.
The existing condition of your cabinets matters more than many homeowners expect. Cabinets that are clean and in good structural condition require less prep work.
Hardware removal and reinstallation adds time and precision to the job. Some painters charge this separately; others include it. Either way, it's a line item worth understanding.
The finish type you select influences cost. A basic single-color finish costs less than custom color matching or specialty finishes. The number of coats required also varies by the existing surface and the color you're choosing.
Your location within the service area can affect pricing. Jobs with easier access and less protective setup required cost less than those in tight kitchens where careful furniture movement and floor protection are essential.
Getting a Transparent Estimate
A professional cabinet painting estimate should include specific details about what's included in the scope. At LMJ Bright Painting Services, we provide written scopes before any work begins so you know exactly what's covered and what isn't.
The best estimates come from in-person assessments. A contractor who quotes over the phone without seeing your cabinets is guessing. An accurate estimate requires evaluating the cabinet condition, measuring the scope, and assessing prep requirements. This is why LMJ Bright Painting Services conducts in-person verification before providing final pricing.
Your estimate should clearly separate labor from materials. It should specify the primer type, paint type, and number of coats. It should list what's included (hardware removal, floor protection, cleanup) and what's not. A good estimate prevents the "hidden issues" problem, the contractor shouldn't be finding surprise damage after starting work if the initial assessment was thorough.
Professional Cabinet Painting Process: Step-by-Step
Professional cabinet painting follows a structured sequence that determines whether your finish lasts five years or fifteen. Skipping steps or rushing through preparation is where most cabinet paint failures originate.
Preparation and Surface Assessment
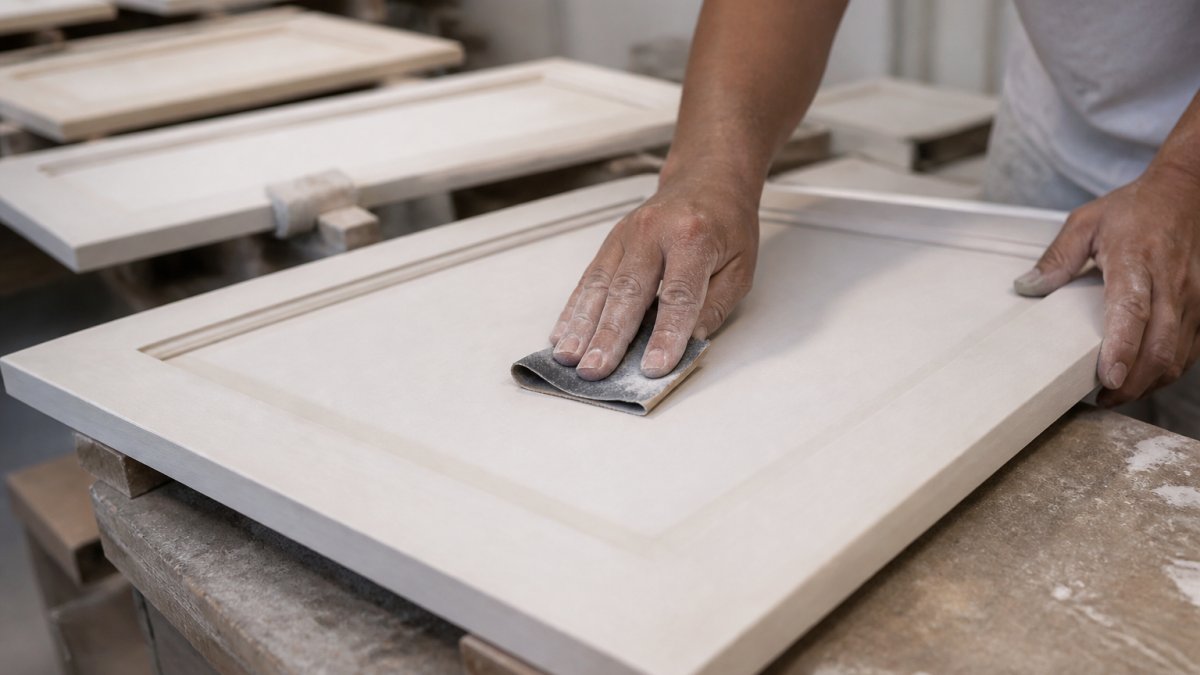
The first phase of professional cabinet painting is thorough assessment and preparation. This is where the real work happens, even though it's invisible in the final result. A painter needs to evaluate whether the existing finish is paint, stain, or varnish. Each requires different prep approaches.
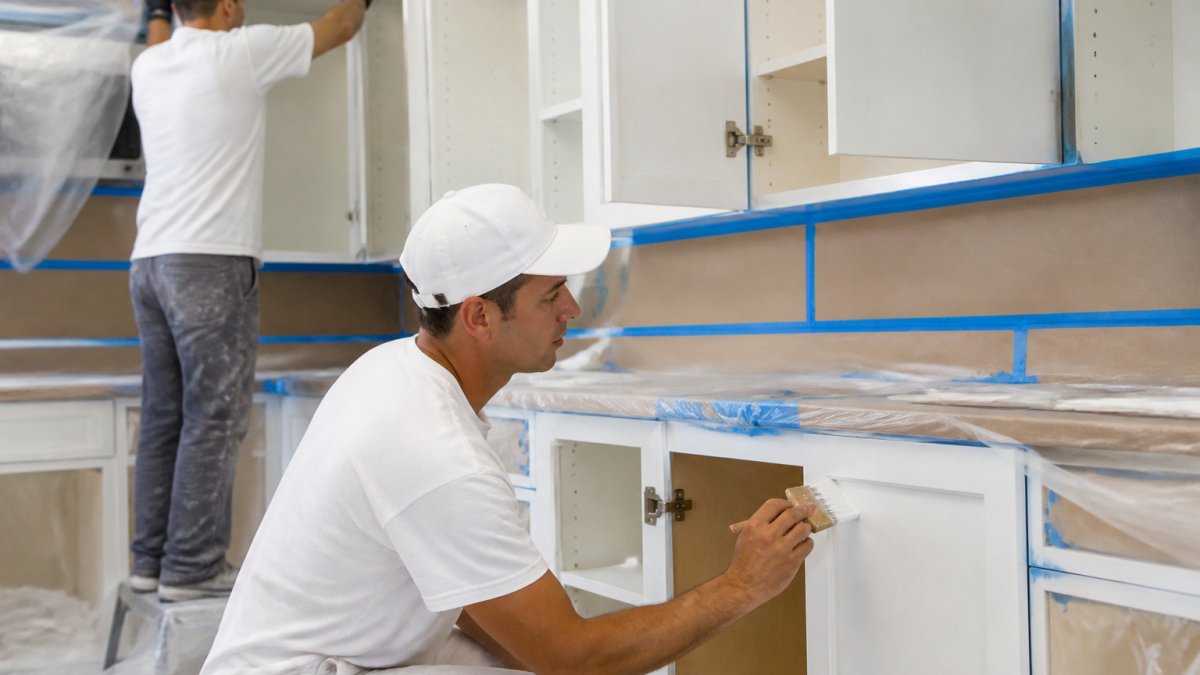
Cabinet doors and drawer fronts are removed from hinges and labeled so they can be reinstalled in the correct locations. Cabinet hardware is carefully removed and stored. The cabinet boxes are cleared of contents and protected with drop cloths. This stage typically takes longer than people expect because careful protection prevents costly mistakes.
Cleaning comes next. All grease, dust, and debris must be removed. Kitchen cabinets accumulate cooking residue that prevents paint adhesion. A degreaser is used, followed by thorough rinsing and drying. Skipping this step is a common reason cabinet paint peels, paint won't stick to a greasy surface no matter how well the rest of the work is done.
Sanding, Priming, and Application
Sanding creates the surface texture that allows primer and paint to adhere properly. For cabinets with existing finish, this means sanding through the old paint or stain to expose bare wood or a dull surface. The grit progression matters.
After sanding, the surface is wiped clean to remove all dust. Any gaps or damage in the wood are filled with wood filler appropriate to the wood type. Once filler is dry, it's sanded smooth to match the surrounding surface.
Primer application follows. The primer type depends on the wood species and the paint color you've chosen. A quality primer seals the wood and provides a base for the topcoat. Two primer coats are standard for cabinet painting.
Paint application comes after primer is complete and fully cured. Cabinet painting typically uses either brush-and-roll application or spray application. Spray application creates a factory-smooth finish without brush marks. Each coat must dry fully before the next is applied.
Quality Inspection and Final Details
Before reassembly, the finished surfaces are inspected under good lighting. Any drips, runs, or imperfections are addressed. Cabinet doors are checked for any areas that need touch-up. The finish should be smooth and uniform across all surfaces.
Hardware is cleaned and reinstalled. Hinges are adjusted so doors close properly and align with adjacent doors. This final assembly stage determines whether the customer opens their cabinet and sees a professional result or notices misaligned doors and hardware.
How Long Does Cabinet Painting Take: Timeline Expectations
The timeline for professional cabinet painting depends on the scope and the drying time required between coats.
The preparation phase typically takes 2-3 days. This includes removing hardware, protecting surfaces, cleaning, and sanding. This is where time cannot be rushed without sacrificing quality. Thorough prep work is what creates durability.
Primer application and drying takes 2-3 days depending on humidity and temperature. Each primer coat requires 24 hours to dry before the next coat can be applied.
Paint application and drying takes another 3-5 days. Two topcoats are standard, with 24 hours drying time between coats.
Your kitchen is functional during most of this timeline. You can use your sink and appliances while the painting is happening. Cabinet doors remain off during the process, so you'll want to plan meals accordingly, but the kitchen isn't completely shut down.
Cabinet Painting vs. Cabinet Replacement: Which Makes Sense
The choice between cabinet painting and cabinet replacement depends on the condition of your existing cabinets and your budget.
When Painting Is the Right Choice
Cabinet painting makes sense when your cabinets are structurally sound but cosmetically dated. If doors close properly, hinges work, and the wood isn't warped or rotting, painting can deliver a complete transformation at a fraction of replacement cost.
Painting is the right choice if you like the layout of your kitchen. If your cabinet configuration works for your workflow and storage needs, there's no reason to spend money redesigning the layout.
Painting is ideal for homeowners with tight timelines. A cabinet painting project takes days. Cabinet replacement takes weeks and creates significant disruption. If you're preparing a rental property for tenants or need your kitchen functional quickly, painting is the practical choice.
Painting works when your budget is limited. A professional cabinet painting project costs less than new cabinetry, installation, and the associated plumbing or electrical work that often comes with cabinet replacement.
When Replacement May Be Necessary
Cabinet replacement becomes necessary when cabinets are warped, water-damaged, or structurally compromised. If doors don't close properly and can't be adjusted, or if the wood is soft or rotting, painting won't solve the underlying problem.
Replacement makes sense if you want to change your kitchen layout. If your current cabinet configuration doesn't work for your needs, a replacement project gives you the opportunity to redesign the space.
Replacement is the choice when you want new features. Modern cabinets offer soft-close hinges, pull-out shelves, and interior organization systems that existing cabinets can't be retrofitted with. If these features matter to your decision, painting can't deliver them.
Durability and Maintenance: Keeping Your Painted Cabinets Looking New
A professionally painted cabinet finish can last for years with proper care. The durability depends on the quality of the paint, the prep work, and how the cabinets are used.
Kitchen cabinets experience moisture, heat, and daily contact. Painted finishes hold up better when you wipe spills promptly and avoid prolonged exposure to steam from cooking.
Maintenance is straightforward. Clean painted cabinets with a soft cloth and mild soap and water. Avoid abrasive scrubbers or harsh chemicals that can damage the finish.
Avoid placing hot pots directly on cabinet surfaces. Use trivets or hot pads to protect the finish from heat damage. Keep cabinet doors from slamming, which can cause stress on the finish and hinges.
Minor touch-ups are normal over time. A small scratch or chip can be touched up with leftover paint from your original project. Keeping paint from your job allows you to address minor damage before it becomes visible.
Choosing a Professional Cabinet Painter: What to Look For
The quality of your cabinet painting result depends almost entirely on the contractor you choose. Experience with cabinet painting specifically matters more than general painting experience.
Look for contractors who provide written scopes before starting work. If a contractor can't or won't detail what's included in their quote, that's a warning sign.
Ask about the paint products they use. Quality cabinet painting uses paint formulated for cabinets, not general-purpose house paint.
Check whether the contractor will be doing the work themselves or using subcontractors. Direct contact with the owner or lead painter reduces miscommunication and ensures accountability.
Request references from recent cabinet painting projects. A contractor confident in their work will provide references willing to discuss their experience. Ask references specifically about paint durability and how the finish has held up over time.
Verify that the contractor is licensed and insured. This protects you if damage occurs during the project and ensures the contractor meets local requirements.
Transforming your kitchen through professional cabinet painting requires choosing a contractor who understands that durability starts with preparation. Build a free estimate with us and see how professional cabinet painting can refresh your kitchen without the cost and disruption of full replacement.
Frequently Asked Questions
Is it worth it to have kitchen cabinets professionally painted?
Professional cabinet painting delivers a factory-smooth finish that DIY methods rarely match, extends cabinet life with proper prep work, and costs significantly less than full replacement. The value depends on your cabinet condition and timeline, if your cabinets are structurally sound but dated, professional painting offers a high-impact kitchen renovation at a fraction of replacement cost. You also avoid the disruption of a full kitchen remodel.
How much does it cost to paint kitchen cabinets?
Kitchen cabinet painting cost depends on cabinet quantity, finish type, current condition, and prep requirements. Pricing varies based on whether doors need extensive sanding, hardware replacement, and the complexity of your color choice. Rather than estimate, request a free consultation and written scope of work that details exactly what's included. This ensures no surprise charges and transparent pricing before any work begins.
How long does professional cabinet painting take from start to finish?
Professional cabinet painting typically takes several days depending on cabinet size, prep complexity, and cure time between coats. Smaller kitchens may finish in a week, while larger projects with custom color matching take longer. The timeline includes initial assessment, surface preparation, primer application, multiple paint coats, hardware reinstallation, and full curing time. Your painter should provide a detailed schedule upfront so you know when your kitchen will be fully functional.
What's the difference between painting cabinets and replacing them?
Cabinet painting refreshes existing cabinets with a new finish, preserving structure and hardware, and costs less than replacement. Replacement removes old cabinets entirely and installs new ones, allowing complete customization but requiring longer timelines and higher investment. Paint works best for structurally sound cabinets; replacement is necessary if doors are warped, frames are damaged, or you need different layout or storage. A professional assessment determines which option suits your situation.