 ultimate-guide
How to Choose the Colour of Kitchen Cabinets in 2026
Table of Contents
- 2026 Kitchen Cabinet Colour Trends Worth Knowing
- How the Colour of Kitchen Cabinets Affects Light and Space
- The Best Paint for Kitchen Cabinets: Finish, Durability, and Sheen
- How to Prep Cabinets for Painting So the Finish Lasts
- Kitchen Cabinet Painting Cost: What Drives the Number
- Matching Cabinet Colour to Countertops, Flooring, and Appliances
- Resale Value and Colours to Avoid in Kitchen Cabinets
- DIY vs. Professional Cabinet Painting: Which Makes Sense?
- Conclusion
- Frequently Asked Questions
Last Updated: September 22, 2026
2026 Kitchen Cabinet Colour Trends Worth Knowing
The colour of kitchen cabinets is shifting away from the all-white look that dominated for a decade. According to Sherwin-Williams' 2026 Colormix Forecast, warm, grounding tones are leading kitchen design this year. At LMJ Bright Painting Services, we see this play out on job sites across the Tampa Bay area: homeowners are asking for depth and warmth instead of stark white.
Warm Neutrals and Earthy Tones
Warm neutrals feel current without chasing a fad. Bone, greige, and soft mushroom pair with almost any countertop, hide smudges better than bright white, and bridge warm wood floors and cool appliance finishes in open-plan kitchens.
Deep Greens, Navy, and Black Accents
Deep greens, navy, and black work best as accents, not whole-room statements. A dark lower cabinet with lighter uppers, or a navy island against neutral perimeter cabinets, adds visual weight without shrinking the room. These colours show dust and fingerprints more than mid-tones, so choose satin or semi-gloss.
How the Colour of Kitchen Cabinets Affects Light and Space
The colour of kitchen cabinets changes how large and bright a kitchen feels, because colour reflects or absorbs light. A paint's light reflectance value (LRV) measures how much light it bounces back, from 0 (black) to 100 (white). Higher-LRV colours make small kitchens feel larger; low-LRV colours create intimacy but can close in a tight space.
The Best Paint for Kitchen Cabinets: Finish, Durability, and Sheen
The best paint for kitchen cabinets is a waterborne alkyd or 100% acrylic enamel formulated for cabinets, trim, and doors. These cure hard, resist yellowing, and stand up to grease and wiping far better than wall paint. Sheen matters as much as colour: matte hides brush marks but shows grease, semi-gloss wipes clean but highlights imperfections, and satin is the middle ground most kitchens land on.
How to Prep Cabinets for Painting So the Finish Lasts
Learning how to prep cabinets for painting separates a finish that lasts from one that peels in two years. Most failures trace back to skipped prep, not bad paint. The sequence that holds up:
- Remove doors, drawers, and hardware; label everything by location.
- Degrease all surfaces with a cabinet-safe cleaner, then rinse.
- Scuff-sand glossy factory finishes so primer can grip.
- Fill dents and cracks with sandable filler; sand smooth.
- Vacuum and tack-cloth away all dust.
- Apply a bonding primer rated for glossy surfaces.
- Sand lightly between primer and each paint coat.
- Apply two thin finish coats; let each dry fully.
- Reattach hardware only after the paint cures.
Kitchen Cabinet Painting Cost: What Drives the Number
Kitchen cabinet painting cost depends on cabinet count, door style, prep condition, and finish, so no single figure fits every kitchen. Professional painting costs far less than full replacement, which is why it remains a popular refresh. Factors that move the number:
| Cost Factor | What Pushes It Higher | What Keeps It Lower |
|---|---|---|
| Cabinet count and size | Large kitchens, tall uppers | Small, standard layouts |
| Door style | Raised panels, glazing | Flat slab fronts |
| Prep condition | Grease, damage, old finish | Clean, sound surfaces |
| Finish and colour | Two-tone, dark colours | Single mid-tone |
| Access and masking | Tight spaces, occupied home | Empty, easy-access rooms |
Matching Cabinet Colour to Countertops, Flooring, and Appliances
Countertops, Backsplash, and Hardware
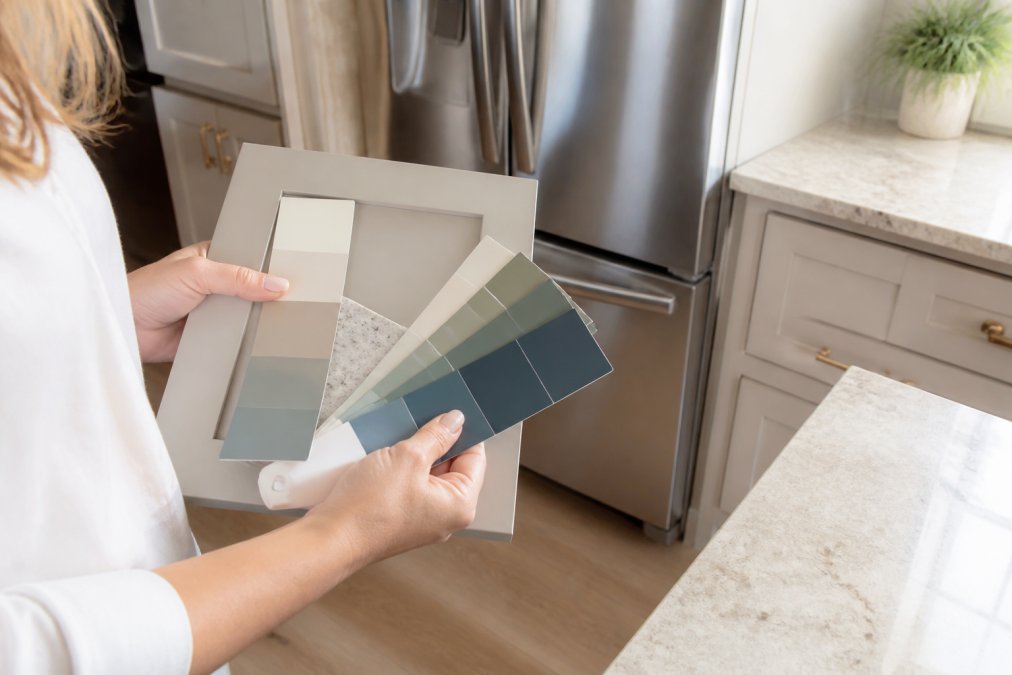
Treat the countertop, backsplash, and hardware as one colour scheme. If your countertop has heavy veining, keep the backsplash plain and the cabinet colour simple. Hardware should follow the room's warm or cool direction: brass leans warm, brushed nickel and chrome lean cool. Mixing warm and cool here is where most kitchens start to look off.
Appliance Finishes and Flooring
Stainless steel is neutral and works with nearly any cabinet colour, but black stainless and panel-ready appliances need more thought. Black stainless pairs well with warm neutrals and deep greens; white appliances look best with lighter cabinets. For flooring, match undertones rather than exact tones: warm wood floors sit with warm neutrals, cool gray floors call for cooler cabinet shades.
Resale Value and Colours to Avoid in Kitchen Cabinets
How appraisers and buyers actually read cabinet color
Appraisers do not assign value to a paint color. They assign value to an updated kitchen relative to comparable homes. A kitchen that reads as 'recently refreshed' supports the appraisal; one that reads as 'dated' or 'half-finished' drags it. Cabinet color is one of the fastest visual signals of which category a kitchen falls into.
Colors that tend to help resale
- Warm whites and off-whites (bone, alabaster, soft cream), the broadest buyer appeal, and the easiest to coordinate with existing countertops and flooring.
- Greige and warm gray, forgiving of everyday wear, reads as 'updated' without reading as 'trendy.'
- Soft sage and muted green, increasingly accepted in mid-range and higher-end markets, especially paired with brass or matte black hardware.
- Two-tone with a neutral perimeter, a white or greige perimeter with a darker island gives visual interest without committing the whole kitchen.
Colors that tend to cost you at resale
- Bright primaries and saturated jewel tones, narrow the buyer pool sharply; a buyer who loves cobalt is rare, and everyone else mentally prices a repaint.
- Heavy two-tone schemes that fight the countertop, buyers read the clash as a mistake, not a design choice.
- Very dark cabinets in small, low-light kitchens, the room photographs poorly, and listing photos drive showings.
- Trend-driven colors applied over poor prep, peeling and chipping read as deferred maintenance, which is the single most expensive signal a kitchen can send.
Regional taste is real, but it is a modifier, not a rule
Buyer response to cabinet color does shift by market. Warm, humid markets with abundant natural light tend to reward lighter, airier kitchens because the light itself is part of the selling proposition. Cooler markets and older housing stock sometimes support deeper, moodier palettes because the architecture and light already lean that direction. The takeaway is not 'pick a regional color', it is 'match the palette to the light and architecture the house already has.' A moody navy kitchen in a bright, low-ceiling ranch reads as a mistake; the same navy in a home with tall windows and dark wood floors reads as intentional.
The resale-safe decision framework
If resale is a near-term goal, run this filter before you commit:
- Would this color look at home in a listing photo of a comparable house in my neighborhood? If not, it is a personal choice, not a resale choice.
- Does it coordinate with the countertop and flooring I am keeping? If it requires replacing either, the true cost is not the paint.
- Will it still read as current in five years? Timeless neutrals and muted earth tones pass this test; most trend colors do not.
- Is the prep and finish quality high enough that the color reads as 'done'? A perfect color over peeling edges reads as a problem.
DIY vs. Professional Cabinet Painting: Which Makes Sense?
Most cabinet painting guides treat DIY versus professional as a personality question. It is not. It is a math problem with four variables: door count, prep condition, finish expectation, and how much your time is worth. How to run the numbers:
The real labor breakdown
A typical kitchen has 20 to 40 cabinet doors and drawer fronts. The work splits roughly like this:
- Removal, labeling, and hardware, 1 to 2 hours.
- Degreasing and cleaning, 2 to 4 hours, more if the cabinets have years of cooking grease.
- Sanding and scuffing, 3 to 6 hours, more on raised-panel or glazed doors.
- Filling, sanding, and dust removal, 2 to 4 hours.
- Priming, 2 to 3 hours plus dry time.
- Two finish coats with light sanding between, 4 to 6 hours plus dry time.
- Reassembly and hardware reinstall, 2 to 3 hours.
The equipment and materials you actually need
DIY savings evaporate when you price the setup:
- A quality airless or HVLP sprayer, brushing and rolling cabinet doors leaves texture that shows under kitchen lighting. Most DIYers who want a factory-smooth finish end up buying or renting a sprayer.
- A spray booth or dust-controlled space, doors need to dry flat and undisturbed. A garage with plastic sheeting works; a living room does not.
- Cabinet-grade primer and enamel, bonding primer rated for glossy surfaces, plus a waterborne alkyd or 100% acrylic enamel. Wall paint will not hold up.
- Sandpaper, tack cloths, filler, masking supplies, and painter's tape, small line items that add up across 30+ doors.
- New hardware and hinges, most homeowners replace these during a repaint, a separate cost from the paint itself.
Materials alone for a mid-size kitchen typically run several hundred dollars before you touch a sprayer.
Where DIY genuinely wins
- Small kitchens with flat slab doors, fewer surfaces, no panel profiles to cut around, faster dry time.
- Rental turnovers on a tight budget, a clean, single-tone refresh in a neutral color is achievable DIY and protects the deposit.
- Homeowners with prior spray experience and a dedicated workspace, the learning curve is the biggest hidden cost, and prior experience removes it.
Where professional work genuinely wins
- Glossy factory finishes and raised-panel doors, prep and spray technique determine whether the finish lasts or peels.
- Two-tone or dark colors, these show every flaw in prep and every inconsistency in spray pattern.
- Occupied homes with kids, pets, or work-from-home schedules, the disruption of a multi-day DIY job is a real cost.
- Kitchens with 30+ doors, the labor math tips hard toward a crew.
- Anyone who needs the job done on a schedule, cure time does not negotiate.
The cost-benefit framework
Run this filter before deciding:
- Count your doors and drawer fronts. Under 20 with flat fronts? DIY is realistic. Over 30 with raised panels? Professional work usually wins on finish and time.
- Assess your prep condition honestly. Grease, damage, or an old failing finish adds hours most DIY estimates miss.
- Decide what finish you will accept. If 'factory-smooth' is the standard, you need spray equipment and a controlled space, which changes the math.
- Price your own time. A weekend-and-evenings project that stretches three weeks has a real cost, even if it does not show on a receipt.
- Get a written professional scope anyway. Comparing a professional quote against your own materials list is the only way to see the true gap. Ask for prep steps, coat count, and cure guidance in writing.
Conclusion
Choosing the colour of kitchen cabinets is a decision you live with for years, so get the prep, finish, and coordination right the first time. LMJ Bright Painting Services brings a structured, veteran-owned approach to every cabinet project, with room-by-room planning, a free smart cost estimator, in-person verification before final pricing, and a written scope before scheduling or payment.
Frequently Asked Questions
What is the most popular colour for kitchen cabinets right now?
Warm whites, greige, and soft sage green lead current demand, with navy and matte black holding steady as accent choices on islands and lower cabinets. Two-tone cabinetry, where uppers and lowers differ, keeps growing because it adds visual weight without darkening the whole room. Your best pick still depends on your countertops, flooring, and how much natural light the kitchen gets each day. Test large swatches on the actual cabinet doors before committing.
What colours should I avoid in kitchen cabinets for resale value?
Highly saturated or trend-driven colours such as bright red, orange, or bold turquoise can narrow your buyer pool in most U.S. markets. Very dark colours in small, low-light kitchens also read as cramped in listing photos. That said, regional demand varies: a coastal market may welcome soft blues and greens that feel risky inland. If resale matters within a few years, stick to warm neutrals, whites, and muted greens, and use bold colour on an island or open shelving instead.
How do I choose a kitchen cabinet colour that complements my countertops?
Start by identifying your countertop's undertone, warm or cool, then pick a cabinet colour in the same family or a deliberate contrast. White quartz with gray veining pairs well with greige or soft white cabinets; warm granite leans better with cream, taupe, or sage. Bring physical swatches and hold them against the countertop in daylight and under your kitchen lights. If the swatch makes the countertop look dull or yellow, try the neighbouring undertone before ruling out the colour.
What is the most durable finish for painted kitchen cabinets?
A factory-style finish sprayed with a hard, waterborne or oil-modified alkyd coating in satin or semi-gloss sheen holds up best against grease, moisture, and daily wiping. Matte looks elegant but shows fingerprints and scuffs faster in busy kitchens. Durability depends as much on prep as on paint: degreasing, sanding, priming bare or glossy surfaces, and letting each coat cure fully before rehanging doors. Ask any painter what specific prep steps and products are in the written scope before work begins.